Introduction
Optimizing 3D models isn’t just about cutting poly count, it’s about doing it smartly. When you’re working with intricate patterns, narrow surfaces, or overlapping geometry, traditional methods often introduce artifacts or bloat your model with unnecessary faces.
That’s where our Remeshing tool already helps, creating new topology that’s clean and performance friendly. But this month, we’re taking it one step further with a brand-new upgrade: Back Projected Filtering, designed to eliminate unwanted back faces and produce single surface meshes effortlessly.
What is Back-Face Filtering and why you´re going to love it
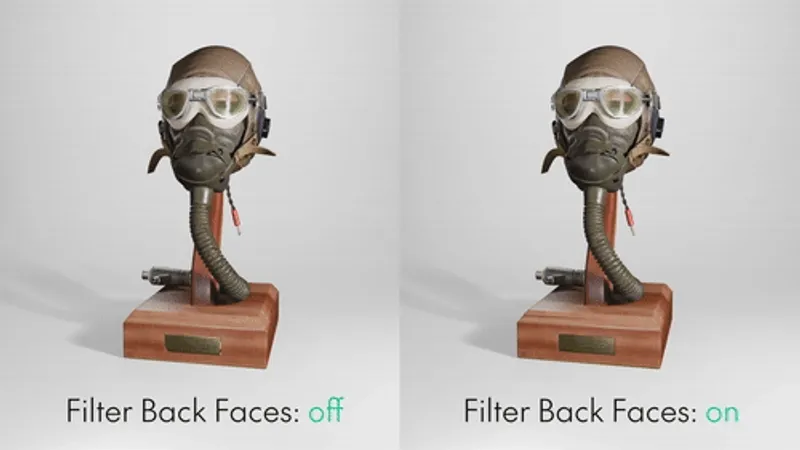
The new Back Projected Filter setting for the Remesher tells the algorithm to skip reconstructing back-facing geometry during the remeshing process. In practice, this means your model only gets a single layer of faces instead of two.
Why is this a big deal?
If your model has topological holes or open areas, remeshing could otherwise generate internal layers that aren’t needed.
With the filter on, only the outer shell remains. This reduces polygon count and simplifies geometry.
For narrow crevices and curved surfaces, this eliminates overlapping backfaces, which helps prevent issues like ambient occlusion artifacts during texture baking.
When should you skip Back Face Filtering?
If your model is fully enclosed (e.g. a sphere), no interior polygon layer will be generated. Therefore, there’s no need to use the Back Face Filter option.
If you want double-sided geometry, like a terrain mesh meant to show from both above and below.
How to configure Remeshing for optimal results
Back Face Filtering is only part of the picture. Pairing it with the right settings is key to making your mesh shine.
Here are the core settings to tweak:
Remeshing Method: Choose between Voxelization and Shrinkwrap. These generate different mesh types—try both to see which preserves your form better.
Remeshing Resolution: Controls mesh smoothness and fidelity. Tweak based on your model’s detail level, especially for small holes or hard edges.
Bake Holes to Alpha: Enable this to convert perforated patterns into alpha textures, preserving the visual without the geometric cost.
All of these are available in the Web UI under your 3D Processor Presets—fully configurable and easy to integrate into your workflow.
Best-in-Class 3D Processing in Your Favorite Tools.
100% Local Processing via Desktop Software.
The most powerful workflow: Remeshing & Optimization passes
If your model is simple, you might get away with just remeshing. But let’s be real - most real-world assets aren’t that straightforward. Different components call for different strategies.
That’s where optimization passes come in. With our Blender Add-On, you can choose to optimize the meshes of your model individually or together, directly within the Blender interface.
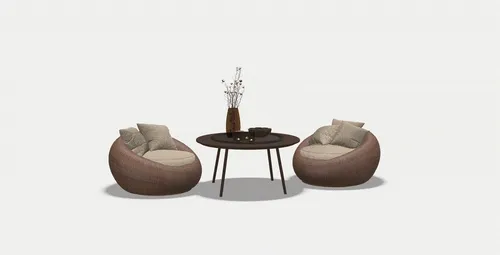
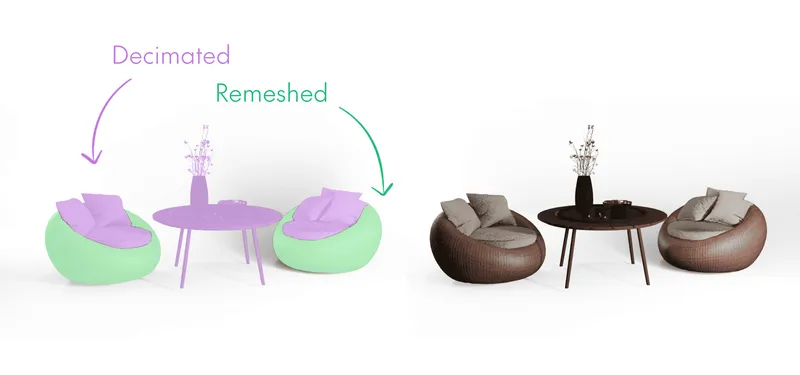
For this month’s featured model, we used a three-step process:
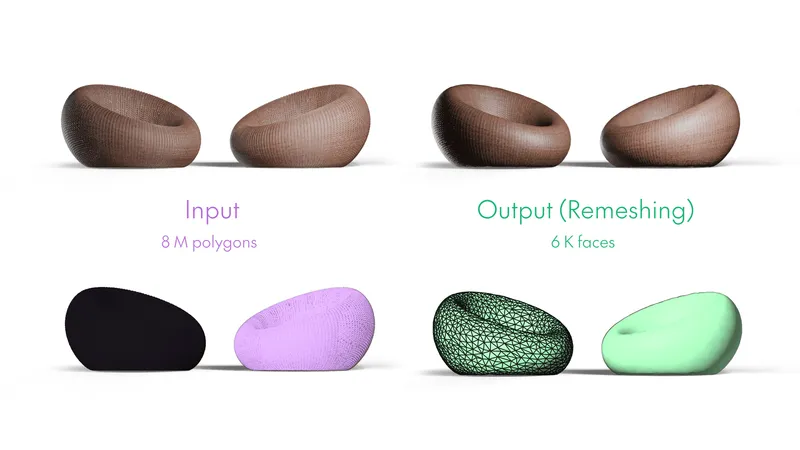
Remeshing – Used for the rattan seats, which featured intricate patterns. We applied Back Face Filtering and alpha baking to create lightweight, visually identical textures. The polygon count dropped drastically, from 18 million to under 100K.
Decimation – Applied to the rest objects. These are solid objects like the cushions and the coffee table. These parts needed topology simplification, but without the aggressive restructuring of remeshing.
Compression & AO – In a final pass, we took all the outputs and applied Draco + KTX2 compression. We also baked a second ambient occlusion atlas to boost realism in lighting.
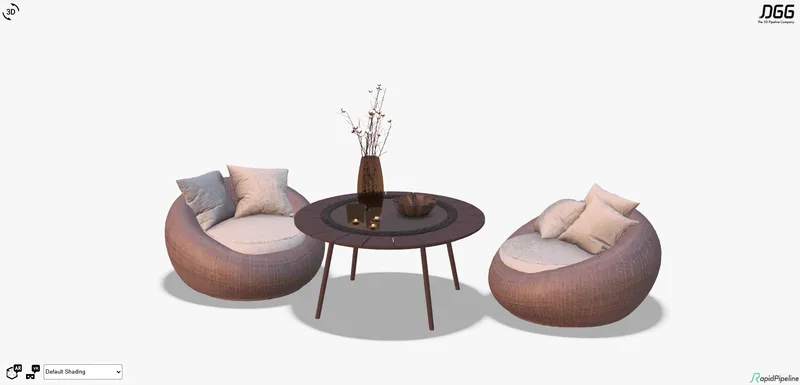
The result
Our final output has the smart simplification of Remeshing with Back Face Filtering, while also having the topology preservation of Decimation: a great, powerful combination.
The model went from 413 MB and 18 million polygons to just 14 MB and 112K faces. Plus, we added a new AO map, that makes it looks even more photorealistic.

Take a closer look at our final model in the interactive viewer below and try RapidPipeline for free yourself.
*Disclaimer: The model has been adapted for ArKit, so the AR view in IOS devices might differ slightly from the shown output.
Meet the Author

Teresa
Technical 3D Artist
Teresa is a 3D Technical Artist at DGG, bringing with her a robust background in Animation and Game design. Driven by a passion for the intersection of art and technology, she relocated to Germany to pursue her artistic ambitions. Within DGG, Teresa plays a pivotal role in infusing the team with her artist's perspective, focusing on the creation of high-quality visual content and ensuring the quality assurance of tools. Her overarching goal is to continually evolve within the industry, delivering compelling visual solutions that resonate with DGG's mission of streamlining and scaling 3D content preparation.