

How to Decimate and Bake Atlas in Autodesk Maya
Table of Contents
General Information
This guide is part of the RapidPipeline 3D Plugin Actions Knowledge Base. It shows how to Decimate and Bake Atlas on Autodesk Maya; if you'd like to know more about it, please check out the following links:
Best-in-Class 3D Processing in Your Favorite Tools.
100% Local Processing via Desktop Software.
Tutorials & Videos
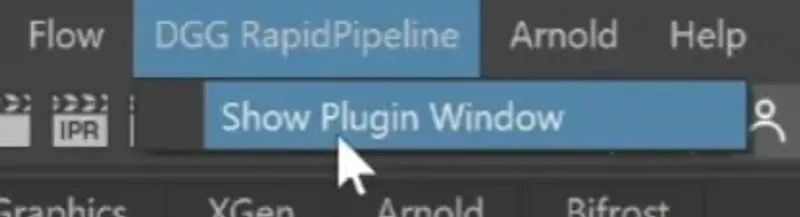
- On the Menu Bar, click on DGG RapidPipeline and choose Show Plugin Window.
- Select the model you want to optimize (if no selection is made, the whole scene will be processed).
- Inside the Plugin window, choose the action Decimate and Bake Atlas.
- Press the Run button. :::tip Decimation actions by default use a deviation target. When the Deviation Percentage is more than zero, the Face Target will act as an upper limit for the face count, instead of acting as a forced target. Increasing the Deviation Percentage will allow the optimizer to go lower when possible. However if you simply want to reach an exact face target, the Deviation Percentage should be set to 0. :::
- Use the Maya Plugin
- Select a part
- Run "Decimate and Bake Atlas" Action
- Examine the results
This tutorial shows how use the RapidPipeline Processor Plugin in Maya to simplify the geometry of a model with decimation and bake the material and texture information into a new UV atlas. For more information see the Maya Plugin Documentation.
The asset used in this tutorial is the "Belz's RTFKT Challenge" (https://skfb.ly/6VnPP) by Belzar Sirus is licensed under Creative Commons Attribution (http://creativecommons.org/licenses/by/4.0/).
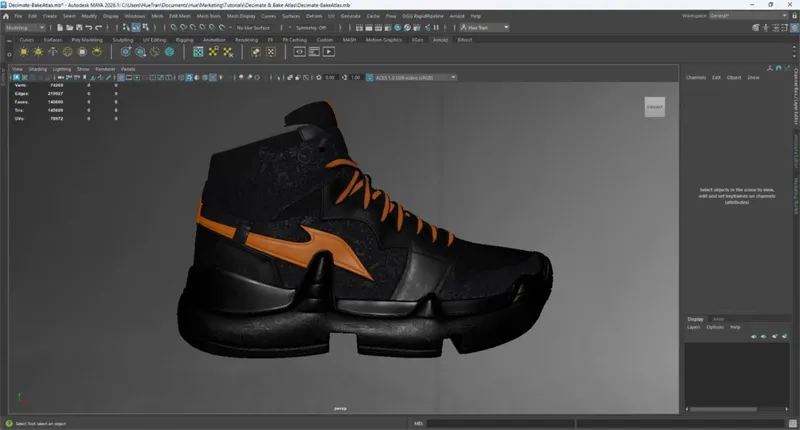
The shoe input model.
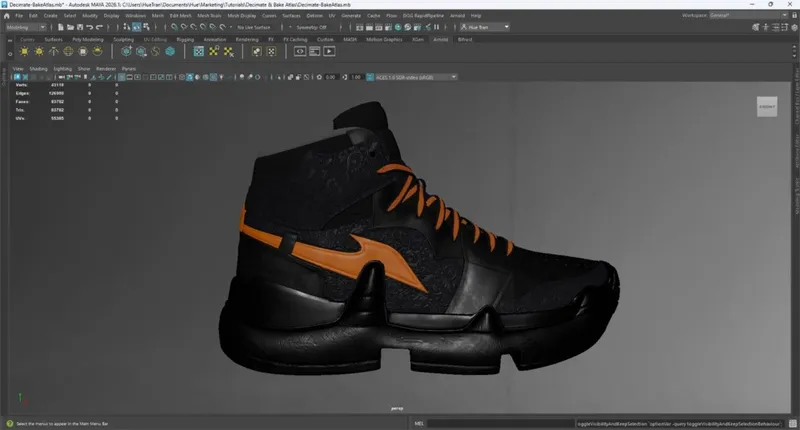
The shoe after the optimization (baked).
Decimate and Bake Atlas Action
- Select the model you want to optimize (if no selection is made, the whole scene will be processed).
- Inside the Plugin window, choose the action Decimate and Bake Atlas.
- Press the Run button.
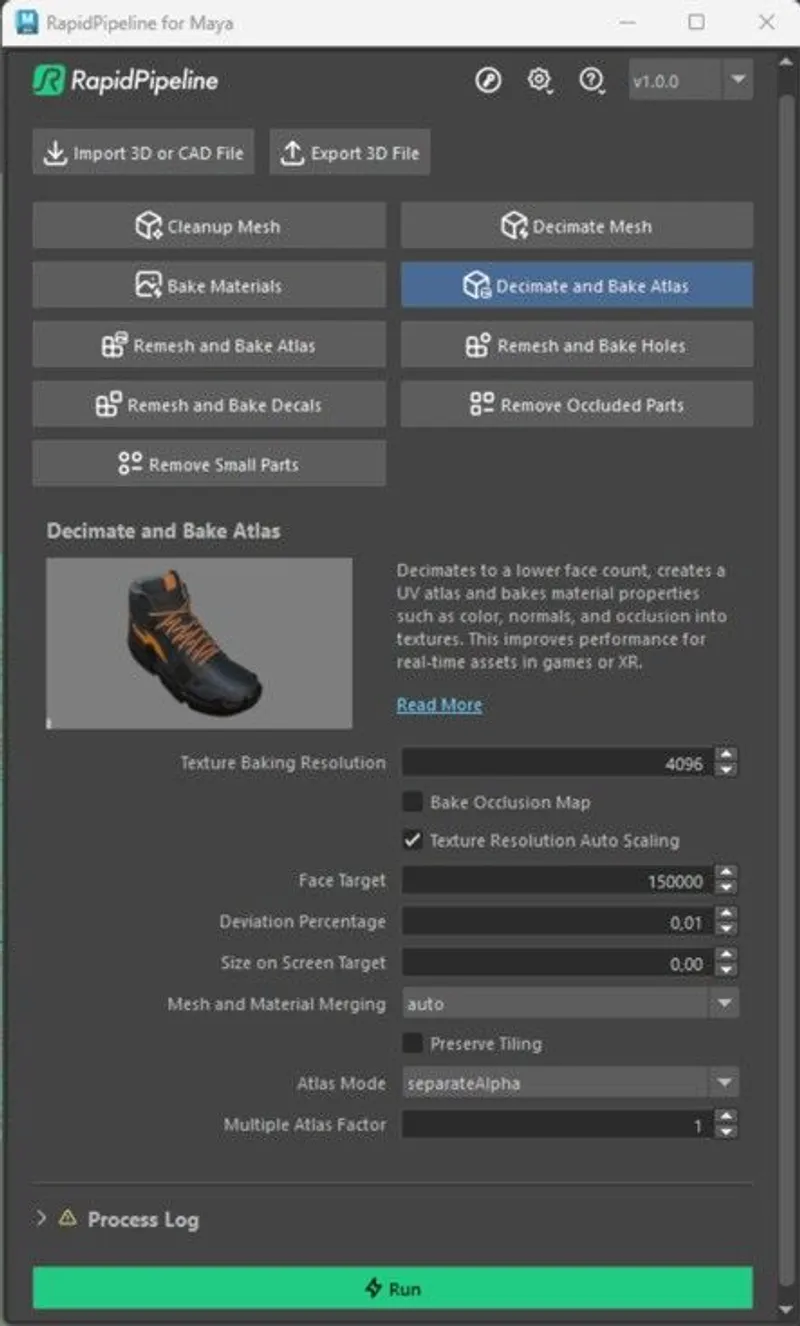
The Decimate and Bake Atlas Action opened in the Plugin.
Examine the Results
To fully check the topology optimization by enabling Wireframe on Shaded from the Viewport Shading drop-down menu, so you can see a wireframe view of your models.
Finally, you can compare the materials and texture count of input and output by opening the Hypershade window (Windows > Rendering Editors > Hypershade, or pressing the shortcut Shift + T). Make sure your object is selected and open the Material Viewer panel at the bottom, and click on the Graph Materials on Selected Objects option.
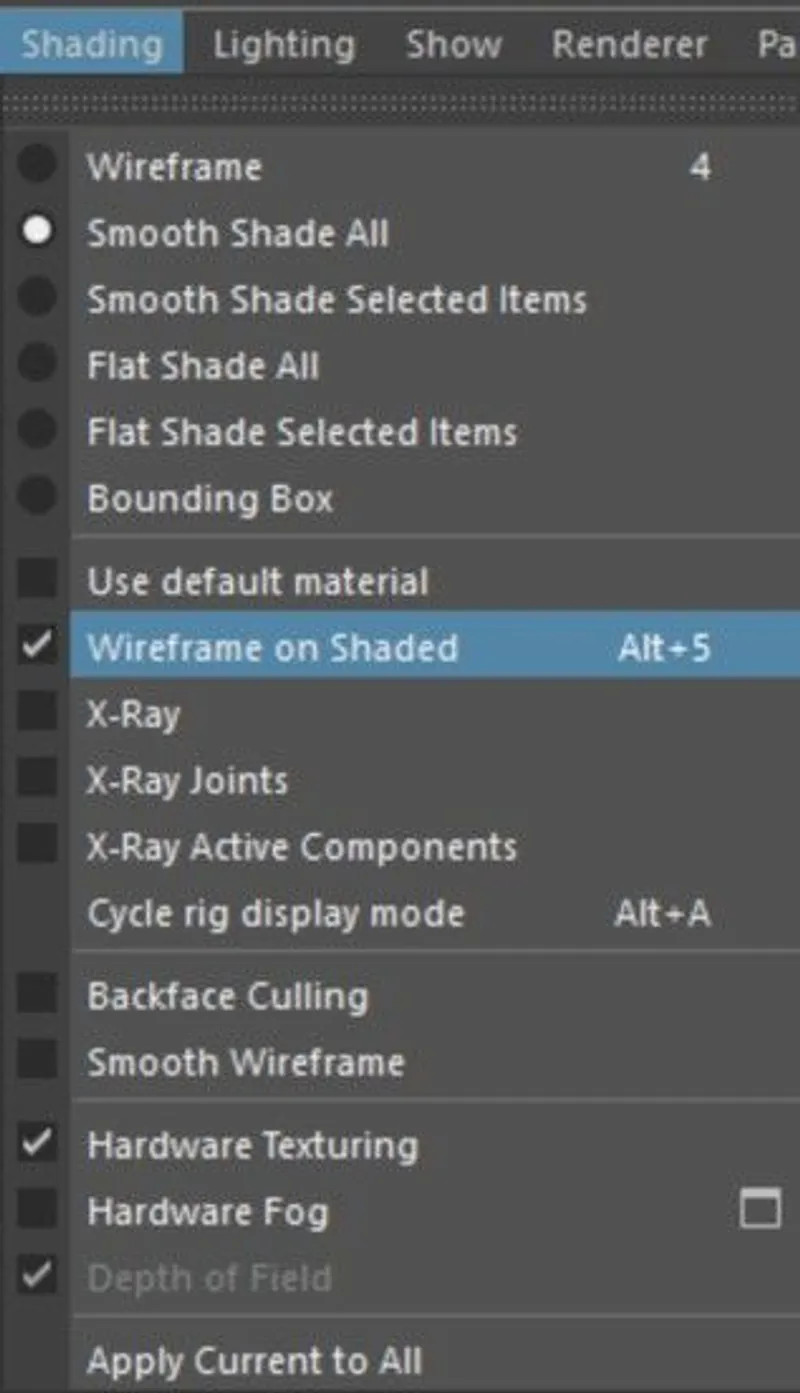
"Wireframe on shaded” option in the Viewport Shading drop-down menu.
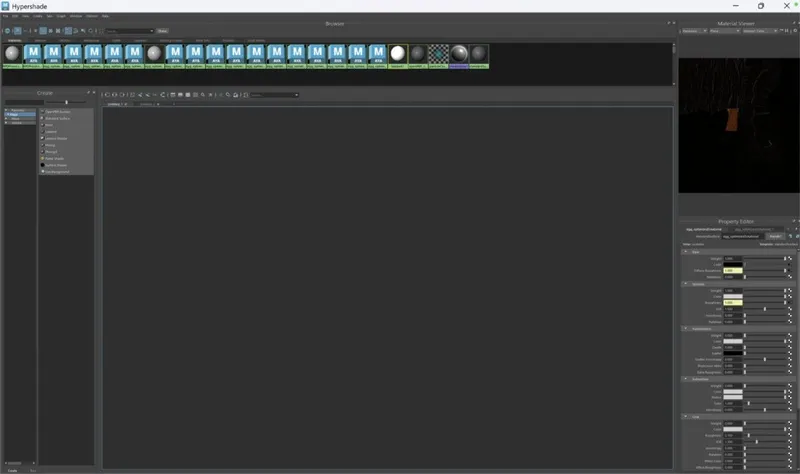
"Material Viewer Panel” inside Hypershade Window.
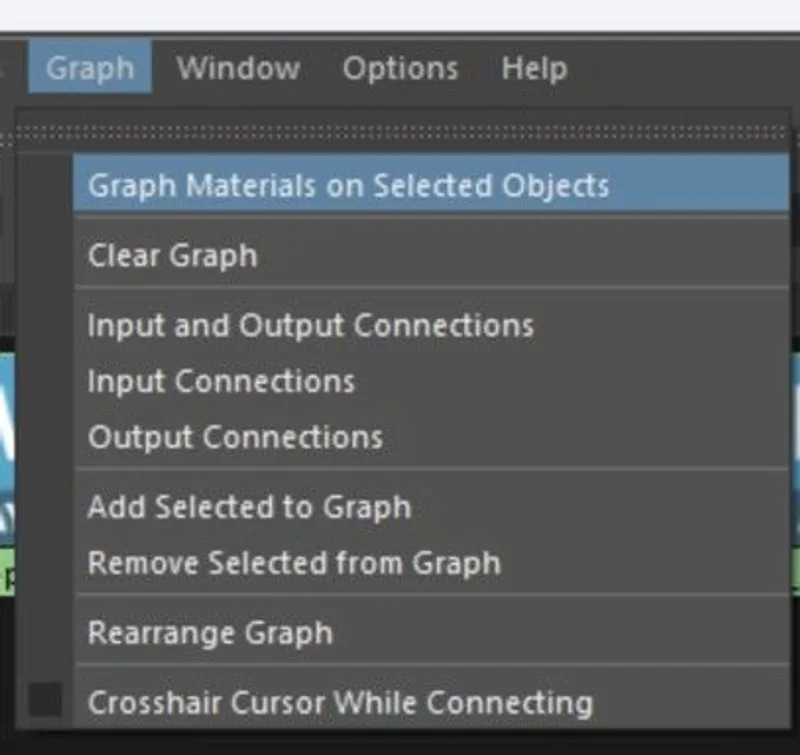
The Graph Materials on Selected Objects option.
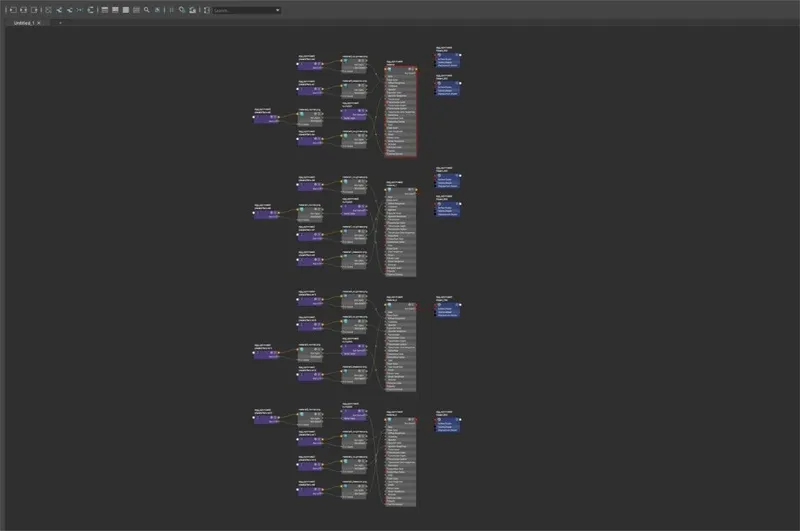
Materials & textures (in graph form) from input model.
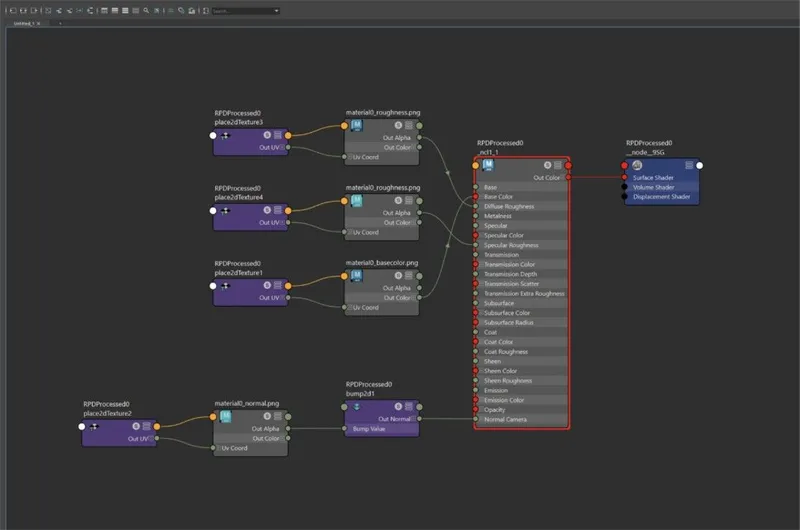
Materials & textures (in graph form) from output model. .
To get started with 3D data conversion and optimization today, sign up for a free account!
If you have any questions, feel free to chat with our human team.
Meet the Author

3D Knowledge Team
3D Technical Artists
RapidPipeline lets you convert, optimize and prepare your 3D models, easily. Try it today, or meet our human 3D experts. The Best-in-Class Tools for Your 3D Processing Jobs